Tuesday, January 25, 2011

.svg Overlays in Cheese

I finally added the capacity for Cheese to show image overlays: any .svg file the user wants to use above the image.

This one was tricky. I started studying from zero the GStreamer API, because I had no idea what was all that about sinks, pads, bins, caps, ghost pads, linking elements, pipelines and so on. What were those things?

So I started reading beginner tutorials, the GStreamer Application Development Manual, and the GStreamer Core Reference Manual.

I was having problems getting the rsvgoverlay plugin in gst-plugins-bad to work. I was getting errors. I debugged, generated huge GST_DEBUG logs, studied the rsvgoverlay plugin code, tested different gst-launch pipelines. I slowly started to understand what was going on.

There was some problem with gst-parse-bin-from-description () and the way it created the rsvgoverlay element. I won't bore you with the details, but rsvgoverlay element has two sinks, and gst_parse_bin_from_description () creates only one ghost pad in each direction (sink or src), it says so in its documentation:

Ghost pads on the bin for unlinked source or sink pads within the bin can automatically be created (but only a maximum of one ghost pad for each direction will be created; if you expect multiple unlinked source pads or multiple unlinked sink pads and want them all ghosted, you will have to create the ghost pads yourself.


Whoa! That wasn't too easy to understand for a beginner. But now it sounds clear, it's funny.


With help from several people but especially from fujii and thiagoss we finally solved it. And here are the results:


Happy birthday bunny!

The overlays don't follow you around, but that's the plan for the future, to link somehow facedetect to rsvgoverlay x and y coordinates.

A bigger picture of the hat
(Because I made that hat) tee-hee!


We are also accepting art contributions in .svg format to include in cheese as sample effects! Christmas/halloween decorations? Balloons, flowers, hats, beards? Your imagination is the limit.

*Whispers* The users can use their own images too very easily editing the .effect text file!

Wednesday, January 19, 2011

New effect in Cheese: face detection!

Now you can play with face detection in Cheese!

Here is a screencast:


Isn't that awesome! =P

I added this new effect using OpenCV plugin from the "gst-plugins-bad" GStreamer plugin-set. It wasn't an easy task! (just kidding, it was easy).

The video preview performance suffered a little, it'll be something to be careful about when I try to do more stuff than just drawing a blue circle. The idea is to draw hats, beards, and other funny elements that follow you around. Improving performance will be a must. We'll see what happens! As usual, your ideas are welcomed ;)

Friday, January 14, 2011

GNOME Outreach Program for Women - week 4

This week was mostly an exploration/learning week.

Releasing a Cheese new version

I learned how to create a Cheese release. The release was 2.91.3 and scheduled for Monday 10, to enter the GNOME 2.91.5 Development Release, scheduled for Wednesday 12. ( http://live.gnome.org/TwoPointNinetyone )

The steps to do this (specific to Cheese) are:

  • Update to last version:
    $ git pull
  • Check that you don't have any modified files:
    $ git status
  • Edit configure.ac and and set the release version in the line:
    AC_INIT(cheese, 2.91.3)
    If libcheese api changed, also change the line:
    CHEESE_LT_VERSION=18.0.0
  • Update the NEWS file:
    $ tools/mantainer.sh -n 2.91.2
    (Use previous version as parameter to see what changed) (I had to change the first line from #!/bin/sh to #!/bin/bash, depends on your system).
  • Tidy up the generated NEWS file, deleting the lines containing translation commits and technical commits intended for developers. Leave only "new feature/fix" commits and group similar commits in single bullet points.
  • Create the tarball:
    $ ./autogen.sh (with your usual flags)
    $ make && make distcheck
  • Upload the tarball (I bumped into some errors here and couldn't create the tarball, so Daniel Siegel uploaded his instead).
    $ scp cheese-2.91.3.tar.gz (user)@master.gnome.org
    Then ssh into master.gnome.org and call install-module.
    $ install-module cheese-2.91.3.tar.gz
  • Tag the new release: (set the tag message to something like "tagged for 2.91.3 release").
    $ git tag -a 2.91.3
    $ git push origin 2.91.3
  • Create the announcement mail and send it to gnome-announce-list and cheese-list:
    $ tools/mantainer.sh -m
  • Update the Cheese website:
    Get gnomeweb-wml from git if you don't have it and run
    $ gnomeweb-wml/projects.gnome.org/cheese/update.pl
    and commit the changes.

Finished! A more generic step by step for releasing is here: http://live.gnome.org/MaintainersCorner/Releasing


The following day I rebuilt Cheese from scratch using jhbuild, skipping gobject-introspection which had some problems, and could finally generate a tarball, so next time I'll be more prepared.

Building Cheese from scratch
  • Remove .la files from /usr/lib if you have any. (http://live.gnome.org/GnomeShell/RemovingLaFiles)
  • $ jhbuild build cheese (my .jhbuildrc file is here: http://pastie.org/1462382 )
  • Get directly from their git repositories these packages:
    • - libcanberra
    • - vala
    • - dconf
    • - clutter-gst
    • - gst-plugins-bad
  • Build and install them. When configuring dconf, use VALAC=/path/to/installed/bin/valac if you installed vala in a different prefix.

This week I also started playing with the idea of creating a new effect, or adding existing effects from frei0r plugins. I looked at frei0r code gallery, especially http://frei0r.dyne.org/gallery?filter=facedetect

I also installed OpenCV and ran the examples. Here is the result for facedetect.cpp :

Cool huh? It also detects two faces at the same time, and even faces using the cheese "stretch" effect!! =P


 (not very "glasses-compatible" tee-hee! x)

Note: the "cheese effect" picture is just that, a picture taken with cheese and then used as input for ./facedetect, it's not the effect already working inside cheese! ;)

Well, we'll see what happens these next weeks, I still have to decide what to focus on, but this effect could be one option.

Friday, January 7, 2011

GNOME Outreach Program for Women report - Weeks 2 & 3

I spent most of Week 2 away for the holidays, for christmas we went 350 km (217 miles) south to a beach town, Rafa traveled and saw the ocean for the first time! Nice but exhausting. Here he is, turning into a sand milanesa:


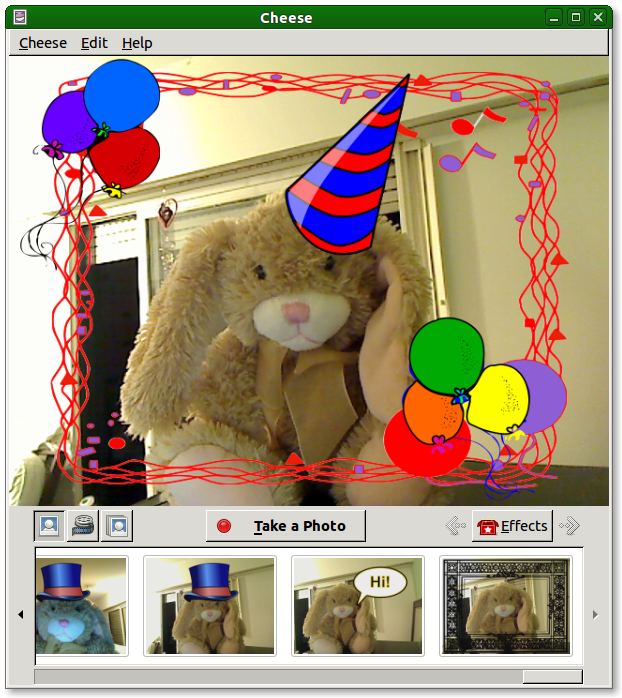
So, on to the report:

I finished the feature to select photo and video sizes independently, This was one of the tickets I started working with when applying for the program. Bug 582268
Back then, the settings were saved using GConf (now being deprecated in GNOME). This is how it looked in gconf editor:


Then Daniel Siegel migrated Cheese to GSettings, which is really great!

To add the new settings I just had to edit org.gnome.Cheese.gschema.xml adding the keys I needed, for example for video x resolution:
 
    <key name='video-x-resolution' type='i'>
      <summary>Video width resolution</summary>
      <description>
        The width resolution of the video captured from the camera
      </description>
      <default>0</default>
    </key>

make install, and that's it, I could read and save the new values (in vala) using:
private GLib.Settings settings;
int width = 0;

settings.set_int ("video-x-resolution", 480);
width = settings.get_int ("video-x-resolution");


or (in C) using :
int width = 0;
GSettings *settings = g_settings_new ("org.gnome.Cheese");

g_settings_set_int (settings, "video-x-resolution", 480);
g_settings_get (settings, "video-x-resolution", "i", &width);

Really easy and clean. Good to know for any app we want to develop and have save settings capability.

Other issue I found is that in Cheese, the preferences dialog is an "Instant apply" window, as described here: http://library.gnome.org/devel/hig-book/2.32/windows-utility.html.en#windows-instant-apply

I quote:

3.3.1. Instant apply windows

For windows that allow the user to change values or settings, such as property and preference windows, update those values or settings immediately to reflect the changes made in the window. This is known as "instant apply". Do not make the user press an OK or Apply button to make the changes happen, unless either:
  • the change will take more than about one second to apply, in which case applying the change immediately could make the system feel slow or unresponsive, or
  • the changes in the window have to be applied simultaneously to prevent the system entering a potentially unstable state. For example, the hostname and proxy fields in a network properties window.
If either these conditions affect only a few of the controls in your window, arrange those controls together into one or more groups, each with its own Apply button. Leave the rest of the controls as instant apply.
Guidelines
  • Do not attempt to validate or apply changes caused by editing a text field control until the user has moved focus to a different control in the window, or the window is closed. Validating after each keypress is usually annoying and unnecessary. Exception: if the field accepts only a fixed number of characters, such as a hexadecimal color code, validate and apply the change as soon as that number of characters have been entered.
  • When the user moves focus to a different control, do not indicate an invalid entry by displaying an alert or undoing the change the user made. Both of these methods are particularly disruptive for focus-follows-mouse users, for whom focus may leave the control more often than it does for a click-to-focus user.

3.3.2. Explicit apply windows

If most of the controls in your window are not suitable for instant apply, consider making the whole window "explicit apply". An explicit apply window has these three buttons in its button box, plus an optional Help button:
  • Apply
    Applies all the settings in the window, but does not close the window in case the user wishes to change their mind.
  • Cancel
    Resets all settings in the window to those that were in force when the window was opened. Note: this must undo the effects of all applications of the Apply since the window was opened, not just the most recent one.
  • OK
    Applies all settings in the window, and closes the window.

Figure 3-5Buttons in an explicit apply window


Also Cheese preferences dialog is not modal, meaning the user can interact with Cheese main window while the preferences dialog is open, and then change settings, and then change something in main window, and change settings again, etc etc. That needed extra steps to ensure the app states remained consistent. (Apply changes to video resolution and photo resolution according to current mode: photo, video or burst mode).

Regarding usability, this kind of dialogs have advantages: no Ok/Apply/Cancel buttons to worry about, the user doesn't have to think, the application is still available instead of blocked. The disadvantage is that once the user changes anything, there is no way back, no cancel button to restore everything to how it was. A "reset to defaults" would be nice to have in some cases.

Other than this, I started to look into Clutter because Daniel had this idea to implement a scrolling effect when changing from one effects page to the next, and it sounds very interesting. I ran the clutter samples found in clutter/tests/interactive, really interesting stuff there. I will be playing around with that next.

Last, I'd like to share a tiny script I use to help me find in files in cheese checkout folder: I search for text in files all the time while developing, but I wanted to exclude some folders (docs, help), and the .c files in src folder (they are generated after .vala files). Everything else I wanted to include in the search. This is very specific to cheese project. So here it is:

#!/bin/bash
grep --color=always -irIn $1 ./src | grep -v "\.c:";
grep --color=always -irIn --exclude-dir=po --exclude-dir=help --exclude-dir=src --exclude-dir=docs $1 .

That's all for now! :)

Ps: use http://tohtml.com to highlight code or get http://pastie.org embedded snippets filtered by planet.gnome.org ;)